
Summer Sunday Ragu

why you should make this:
Three reasons:
Pasta recipes, this one included, typically come together quickly (i.e less time in the kitchen on a hot day)
It tastes as good at room temp as it does straight off the stove, which means it packs well for beach days and picnics, or if you want to make it ahead and have it for dinner without reheating.
Mushrooms, garlic, and wine make for a sublime, saucy, umami trio.
what you’ll need:
1 carrots, peeled and finely chopped
1 celery, finely chopped
1/2 onion, finely chopped
2-3 cloves garlic, minced
1 pd mushrooms
1 cup chicken stock
1/2 cup wine
1 tbl thyme
salt & pepper to taste
how it’s done:
In a large skillet or sauce pan, heat up 3 tbl olive oil over medium heat.
Once the oil is shimmery and runs quickly through the pan, add the onion, carrot, and celery with a pinch of salt. Allow to soften and cook down, at least 10 minutes. (Be patient with this step, you are building the base for great flavor!)
Add garlic and stir constantly until garlic is fragrant, about 1 minute.
Push the mixture to the sides of the pan and add half the mushrooms in the center. Let it sit without stirring for 5-8 minutes. This will allow the mushrooms to brown. Once the mushrooms have a nice golden color, add the rest of the mushrooms with a pinch of salt and pepper. Stir to incorporate.
Once the mushrooms have cooked down, add the wine.

Once the wine has reduced and the mixture beings to bubble, add the chicken stock.
Turn the heat down and allow the mixture to simmer.
At this point, boil a pot of water for the pasta. Add 2 tbl salt to the water.

Cook the pasta just under it’s cooking time, so it still has a slight bite to it.
Using a slotted spoon, add the pasta from the water to the mushroom sauce. Add in about 1/4 cup of the pasta water. This will help the sauce stick to the pasta and allow the pasta finish cooking in the sauce.
Add the butter and thyme and more salt, if needed.

Transfer to a serving bowl and garnish with basil and grated parmesan.
Serve immediately. (But still delicious at room temp, too!)

Garden Vegetable Chickpea Salad

why you should make it:
For the versatility alone, this recipe is a winner. Eat it straight out of the bowl with a fork, as a dip with some crackers and crunchy veggies, or on a sandwich with lettuce and tomato - there are no rules! The flavors run deep and the texture is *chefs kiss*.
But wait, there’s more! Chickpeas are a great source of fiber, which helps your digestion stay regular. And the variety of raw vegetables and seeds packs this salad with vitamins C, A, K, potassium, and calcium.
*Recipe inspired by the wonderful people at Pick Up Limes.
what you’ll need

1 can chickpeas
1 small carrot, finely chopped
1/4 red bell pepper, finely chopped
1/4 red onion, finely chopped
3 Tbsp fresh dill, finely chopped
2 Tbsp roasted sunflower seeds
1 -2 pickles, chopped
1/2 lemon, juiced
3 Tbsp mayo
1/2 tsp dijon mustard
1/4 tsp salt
1/8 tsp Black pepper
how to do it:
Add chickpeas to a large bowl and mash with a fork until all chickpeas are broken up, but not completely ground to a paste.
Add the remaining ingredients to the bowl and mix, continuing to mash.
Add more lemon or salt for desired taste.
Refrigerate for at least 30 min. to allow the flavors to incorporate.

Connecting To Your Roots In Postpartum
During postpartum, new parents often face decisions regarding their family heritage, traditions, and customs. Will the baby be baptized? Take on a family name? Will the new parent spend a strict forty days cocooned in warmth? Are there superstitious meals that must be consumed for health and prosperity? Or will all of this be pushed aside for the new family to form a whole new set of traditions?

Beloved Tradition - Annual Silberstein Family Lobster Fest, Circa 1995
The majority of us walk the fine line between the traditions we grew up with and the ones that more conveniently fit into our lives now. And while I believe in the start of new traditions, I do encourage those in Postpartum to take a look at their roots.
In the face of a new life, what carries on and what becomes forgotten?
Maybe you have grown to feel discomfort stepping into a church, but in the land where your ancestors settled, there is a tradition of foraging mushrooms in the spring or stomping on grapes at the end of summer, and that can be the custom you choose to carry forward. Food can hold as powerful a connectedness as prayer, and the holiday of Passover invites us into this intersection.
Starting with the Seder, everyone gathers around a table (or this year, a Zoom chat) and takes turns reading aloud from the Haggadah, which holds the story of Passover and its accompanying prayers. It is the time during the evening where all chatter of work and politics comes to a halt, and we take time to honor our roots. However, Passover is unique in the sense that food has a large participating role in the retelling of the story.
Parsley or celery (known as karpas) is used to symbolize new life or Springtime. Salt water and horseradish are used to symbolize the tears and bitter struggle of the Jewish people in Egypt. We dip the karpas into the saltwater to remind us that with struggle and hardship there is also a new season and new life.
After the seder, we eat! We eat and we drink, and maybe over the brisket, we discuss the rent of my cousin’s apartment in Manhattan. And maybe my cousin’s uncertainties are not so different from my great-great grandfather’s, who also left his home to build a life in that same city. And maybe while picking at the fruit salad, Grandpa is quiet and not fully present. But I know that when Grandpa’s mind wanders, it is being cradled by the roots of our family, and that when a new life is born, it is also being cradled by the roots of our family.
The recipe I am sharing is called Charoset. It is a mixture of apples, walnuts, wine, and spices, which during the Seder, symbolizes the mortar the slaves used to build the pyramids. And while the symbolism itself is part of the brutal collective memory, the dish is sweet and delicious.
As you’re considering which customs to carry forward with your new family, consider the idea that it is not necessarily the custom in full that needs to be passed on, but the concepts and the teachings. Maybe you make Charoset throughout the year to be reminded of the sweetness in life. Maybe you revamp the recipe to make it your own, while still acknowledging where it came from, acknowledging where you are now, and acknowledging that wherever you are going, there will be struggle and hardship, but also a new season and new life.

3 apples
2 tbl lemon juice
½ cup walnuts
¼ tsp cinnamon
½ tsp ground ginger
3 tbl wine
2-3 tbl honey
Chop apples coarsely by hand. Place them in a large bowl and toss them with lemon juice to prevent discoloration
Chop the walnuts coarsely by hand and add them to the apples. Add the cinnamon and ginger.
Pour in the wine and honey.
Let stand, covered, in the refrigerator for up to 6 hours or overnight, tossing the mixture periodically

Prenatal Meal Prep: Mini Vegetable Frittatas (with video!)

Mini Frittatas with Onion, Mushroom, and Broccoli
Why they’re great: An excellent source of both protein and fiber, these mini egg cups are super easy to eat and will keep you full for hours. Cook up a batch prenatally and have a quick, warm, nutritious meal when you need it most in postpartum.

4 eggs
2 egg whites
1/2 yellow onion, chopped
3/4 cup mushrooms, thinly sliced
1/2 cup broccoli, finely chopped
1/4 cup heavy cream or milk
2 tbl basil, chopped
cheddar cheese (optional), grated
Salt & pepper
Preheat the oven to 375ºf
Add mushrooms to a heated cast iron skillet. Allow to sit for about 5 minutes before mixing with a pinch salt.
Add onions and broccoli to the skillet with a pinch of salt and pepper. Cook until vegetables are soft and beginning to brown, stirring occasionally.
While vegetables are cooking, crack eggs and eggs whites into a large bowl. Add milk or cream, 1/4 tsp salt, and basil. Whisk until egg appears foamy, about 1 minute.
Add vegetables to the large bowl. Mix to combine.
Line the cups of a muffin sheet with butter (it helps to use your fingers)
Add egg mixture to each muffin cup and sprinkle with cheese, if using.
Place in the oven for 20-25 minutes, or until frittatas are cooked through (can be tested with a toothpick)
Allow to cool before placing them in an air-tight container in the freezer. Can freeze for up to one month.

Prenatal Meal Prep: Vegetable Hand Pies

As someone with little to no baking skills,
I am here to tell you that making your own pie dough is entirely doable. Have I perfected the skill? Not really. But I’m not in the business of making pies; I’m in the business of creating convenient systems and supportive outlets for postpartum. The recipe I used can be found HERE (bless you, Youtube tutorials). It took me about 8 minutes, gave me no issues, and does not contain preservatives or additives, which was the aim for making my own dough in the first place. This dough feels convenient and supportive!
(Note: As I am a novice pastry maker, I used unbleached white flour as opposed to experimenting with gluten free options. Although unbleached, it is still white flour, which has a lower nutritional value than other options on the market. It is best consumed in small moderation.)
Hand pies are wonderfully helpful in postpartum as they freeze well and do not require utensils. I would also like to take this moment and remind you that no one is forcing you to eat breakfast foods during breakfast time or dessert foods during dessert time. These hand pies can be eaten any time, day or night. If it’s 2:30 in the morning and you’re popping a mushroom and lentil hand pie in the oven, give yourself a pat on the back.
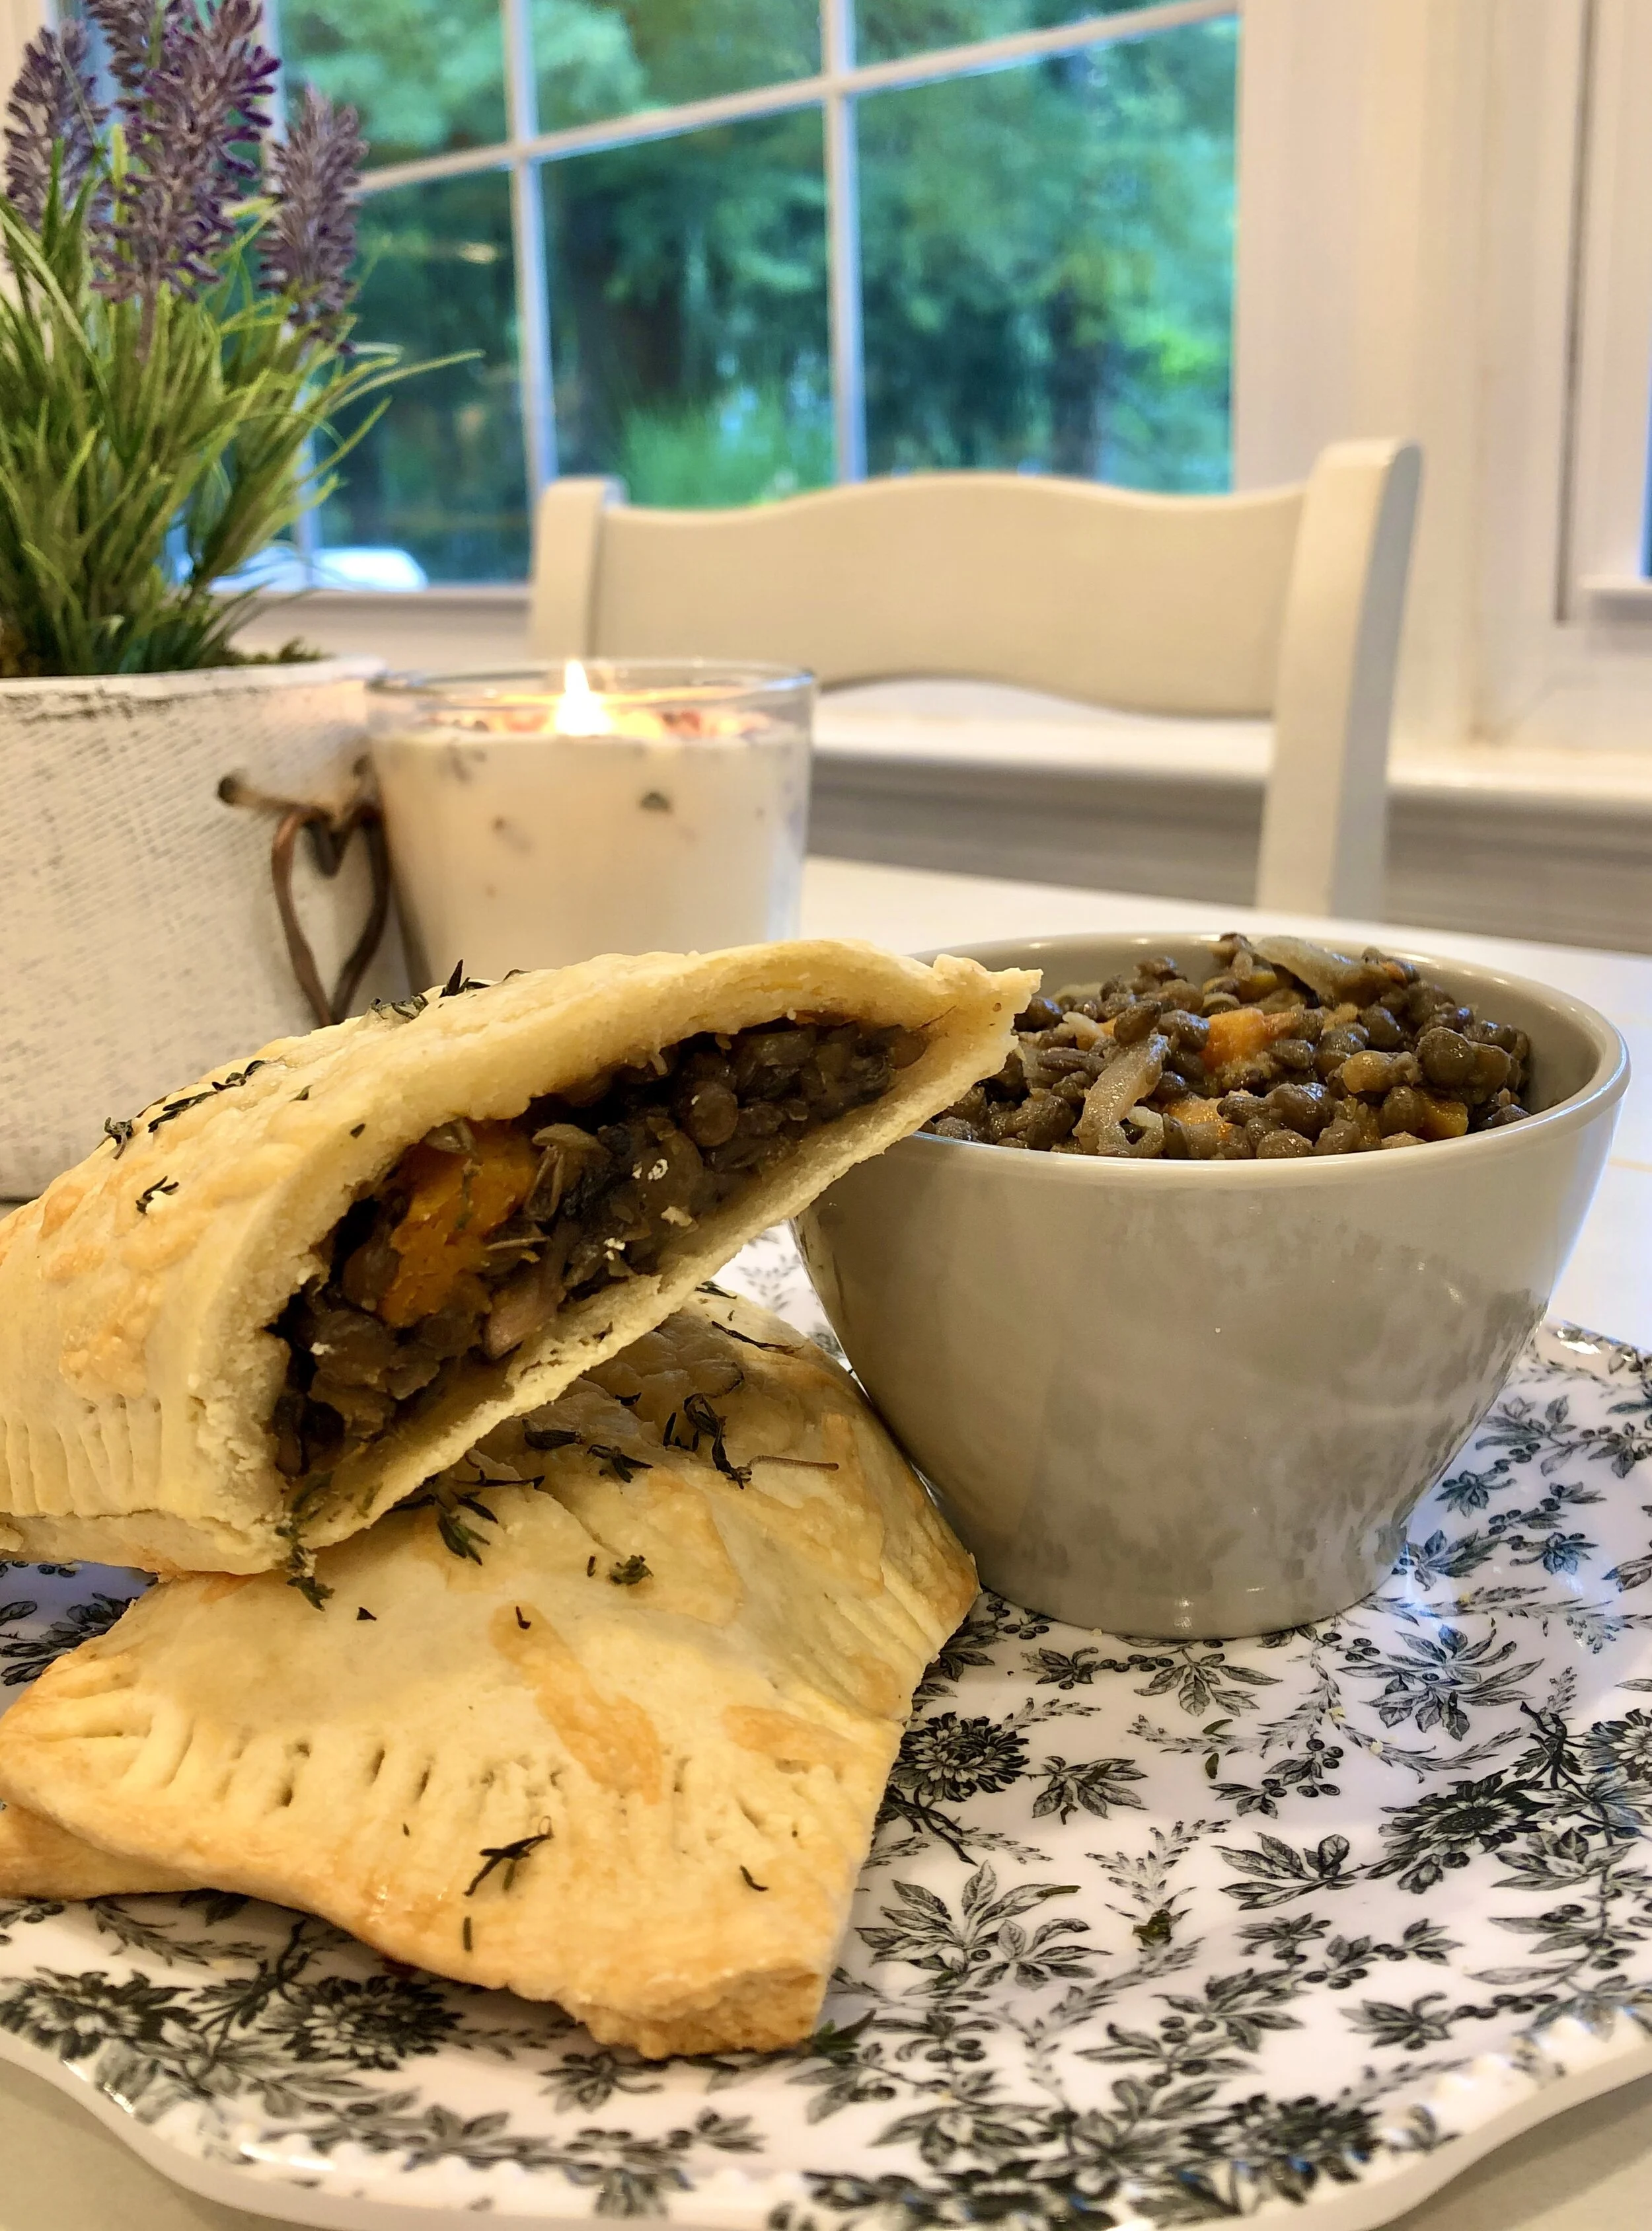
Lentil Hand Pies with Caramelized Onion, Mushroom, and Squash
Time: 1.5 hours Serving: Makes about 2-3 hand pies
Short crust pastry dough
1 cup dried green, brown, or French lentils
2 cups chicken broth
Approx. 1/2 cup crimini mushrooms, sliced
1 small butternut squash, cut into small chunks
1 small onion, thinly sliced
2 tsp freshly grated ginger
1 egg, beaten (add 1 tsp water to thin it)
1 tbl thyme, chopped
1 bay leaf
3 tbl olive oil
salt + pepper to taste
1. Bring pastry dough to room temp. Preheat oven to 375of.
2. Coat butternut squash pieces in olive oil, salt, and pepper. Lay at on a baking sheet and place in the oven for approx. 30 min, tossing the pieces over about half way through cook time.
3. Heat 1 tbl olive oil in a large pan on medium-low heat. Add onions and sauté until translucent, about 6 minutes. Add ginger, salt and pepper. Stir occasionally until onions are golden brown. Be sure not to allow ginger to stick to the pan. Use small amounts of water as needed to deglaze the pan. Transfer to separate bowl.
4. Spread out mushrooms on the same pan. Raise the heat slightly. Allow mushrooms to release moisture, leaving them alone for about 6-8 minutes. Add thyme, salt and pepper. Add in squash and ginger-onion mixture. Stir to incorporate and then take off the heat.
5. Put a small amount of our on the counter top. Roll out dough until it is about 1 cm thick. Cut four 6x3in pieces. (You may have to roll out dough again until you have desired number of pieces.)
6. Add filling onto one piece, leaving a border around the edge. Brush the edges with the egg wash and do the same the border of an empty piece. Place the empty piece on top of the mixture, egg wash side down. Use a fork to crimp together the pieces and add two slits at the top. Repeat with other pieces.
7. Place hand pies on a parchment lined baking sheet. Option here to add thyme and shredded cheese on top. Put them in the oven for about 25 minutes at 375o or until golden brown around the edges.
8. Allow to cool until pie can be handled without utensils. Enjoy!
Allow to cool completely before freezing. Hand pies can stay in the freezer up to three months. To reheat: Preheat oven to 350ºf. Place hand pies on a sheet tray and put them in the oven for about 15 min or until they are warmed through.
Prenatal Meal Prep: Supplementing Your Multivitamin

Perhaps you never really thought about the levels of vitamins and minerals in your system, whether or not some were more deficient than others. Maybe you dabbled in supplements because someone said you were likely low in iron or vitamin D. Then suddenly you find yourself pregnant and these deficiencies feel like they carry higher stakes. You’re taking a daily Prenatal multivitamin, but your care provider says it’s still not enough. Luckily, plenty of foods naturally contain the vitamins and minerals found in Prenatal supplements.
Below is a list of foods that contain some of the most common vitamins found in prenatals, followed by a few meal ideas that will make this all seem less daunting (Think: tacos.)
It is also important to keep in mind that not every food holds the same amount of each nutrient and every body will absorb these nutrients differently, but by incorporating these items into your daily diet, you can feel more in control of your pregnancy and the changing needs of your body as it prepares for childbirth.
**DISCLAIMER: These lists are not to be used as a substitute for your prenatal vitamins, but rather a means of further supplementation through diet.
FOLATE
Folate is a naturally occurring B Vitamin found in food such as legumes, nuts, seeds, leafy greens, and some juices. When added to supplements, it becomes Folic Acid. It has been shown that increasing your intake of folate and folic acid during pregnancy helps in developing the babies nervous system and may prevent preterm birth and neural tube defects such a spina bifida.


IRON
As your body works to produce enough red blood cells to supply both you and your baby, the need for iron increases. Because the body cannot make iron on its own, we have to consciously ingest enough to keep our supply balanced. While animal products contain some of the highest level of iron, it is also possible for those with a plant-based diet to maintain their iron supply with foods such as tomato juice, beans, and spinach. It has also been shown that using cast iron cookware can raise the levels of iron in your food.


CALCIUM
Calcium is essential as the baby develops its skeletal system and strengthens its heart. If there is an insufficient amount of food-sourced calcium, the baby will take what it needs from the pregnant person’s bones. Luckily, during pregnancy, the body has the ability to more easily absorb calcium. Calcium is not only found in dairy, but many leafy greens also contain a good supply.


Vitamin C
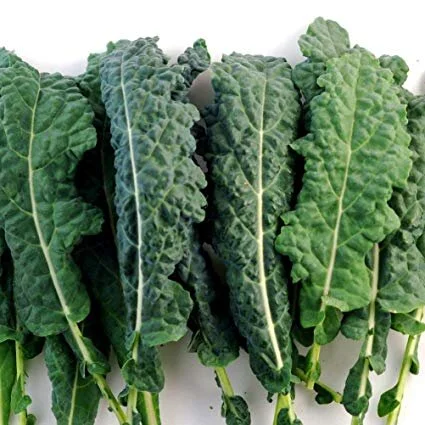
Recent studies have shown that Vitamin C has more or less a neutral effect on fetal development, meaning it neither helps nor harms the baby. However, Vitamin C allows the body to more easily absorb iron, which is very important for fetal development. While it may not be necessary to take a separate Vitamin C supplement, being aware of your daily intake will help to ensure your body is sufficiently storing the iron it needs. Citrus fruits are a great way to take in Vitamin C as well as dark leafy greens like kale and certain herbs such as thyme.


VITAMIN D
Vitamin D is important for the absorption of Calcium, but unfortunately, there are very few food sources that naturally contain Vitamin D and even fewer that are safe for pregnancy. Your best bet for natural Vitamin D intake is to spend at least 15 minutes in direct sunlight (Of course, this isn’t always consistent).


Tomato Soup and A Tuna Melt

1 stick of butter
2 tbl olive oil
1 large onion, sliced
2 tsp fresh thyme
4-5 basil leaves, roughly chopped
1 28oz can crushed tomatoes
3 tbl tomato paste
4 cups broth
1/2 c flour
Salt and pepper to taste
In a large pot, melt the butter over medium heat. Add olive oil and onion. Cook until onion is soft, translucent, and starting to brown. (About 10 minutes) Add thyme, basil, 1/2 tsp salt and 1/2 tsp pepper. Stir, allowing the aromatics to be released, about 2 minutes. Add tomatoes and tomato paste. Stir to blend. Simmer for 10 minutes. In the meantime, add equal parts flour and broth in a separate bowl. Whisk to form a paste. Stir into tomato mixture. Add remaining broth. Bring to a boil, then simmer for 30 minutes. Stir frequently as soup will stick to bottom of the pot.
SANDWICH: Heat a medium size pan on high heat. Spread butter onto one side of each slice of bread. Shred about 1/2 cup of cheddar cheese. When pan is hot, add one slice of bread and lower heat to medium low. Place cheese on top of bread. Layer about half the tuna salad on top of the cheese. Add the second piece of bread so the buttered side is facing up. When the bottom piece of bread is golden brown (be patient!), flip the sandwich to toast the other side. Transfer to a plate and cut in half.
Put soup in a blender in batches, blend until smooth. (Pour blended soup into a new pot.) Add salt and pepper to taste, and a little cream (optional) for added richness. Serve hot.
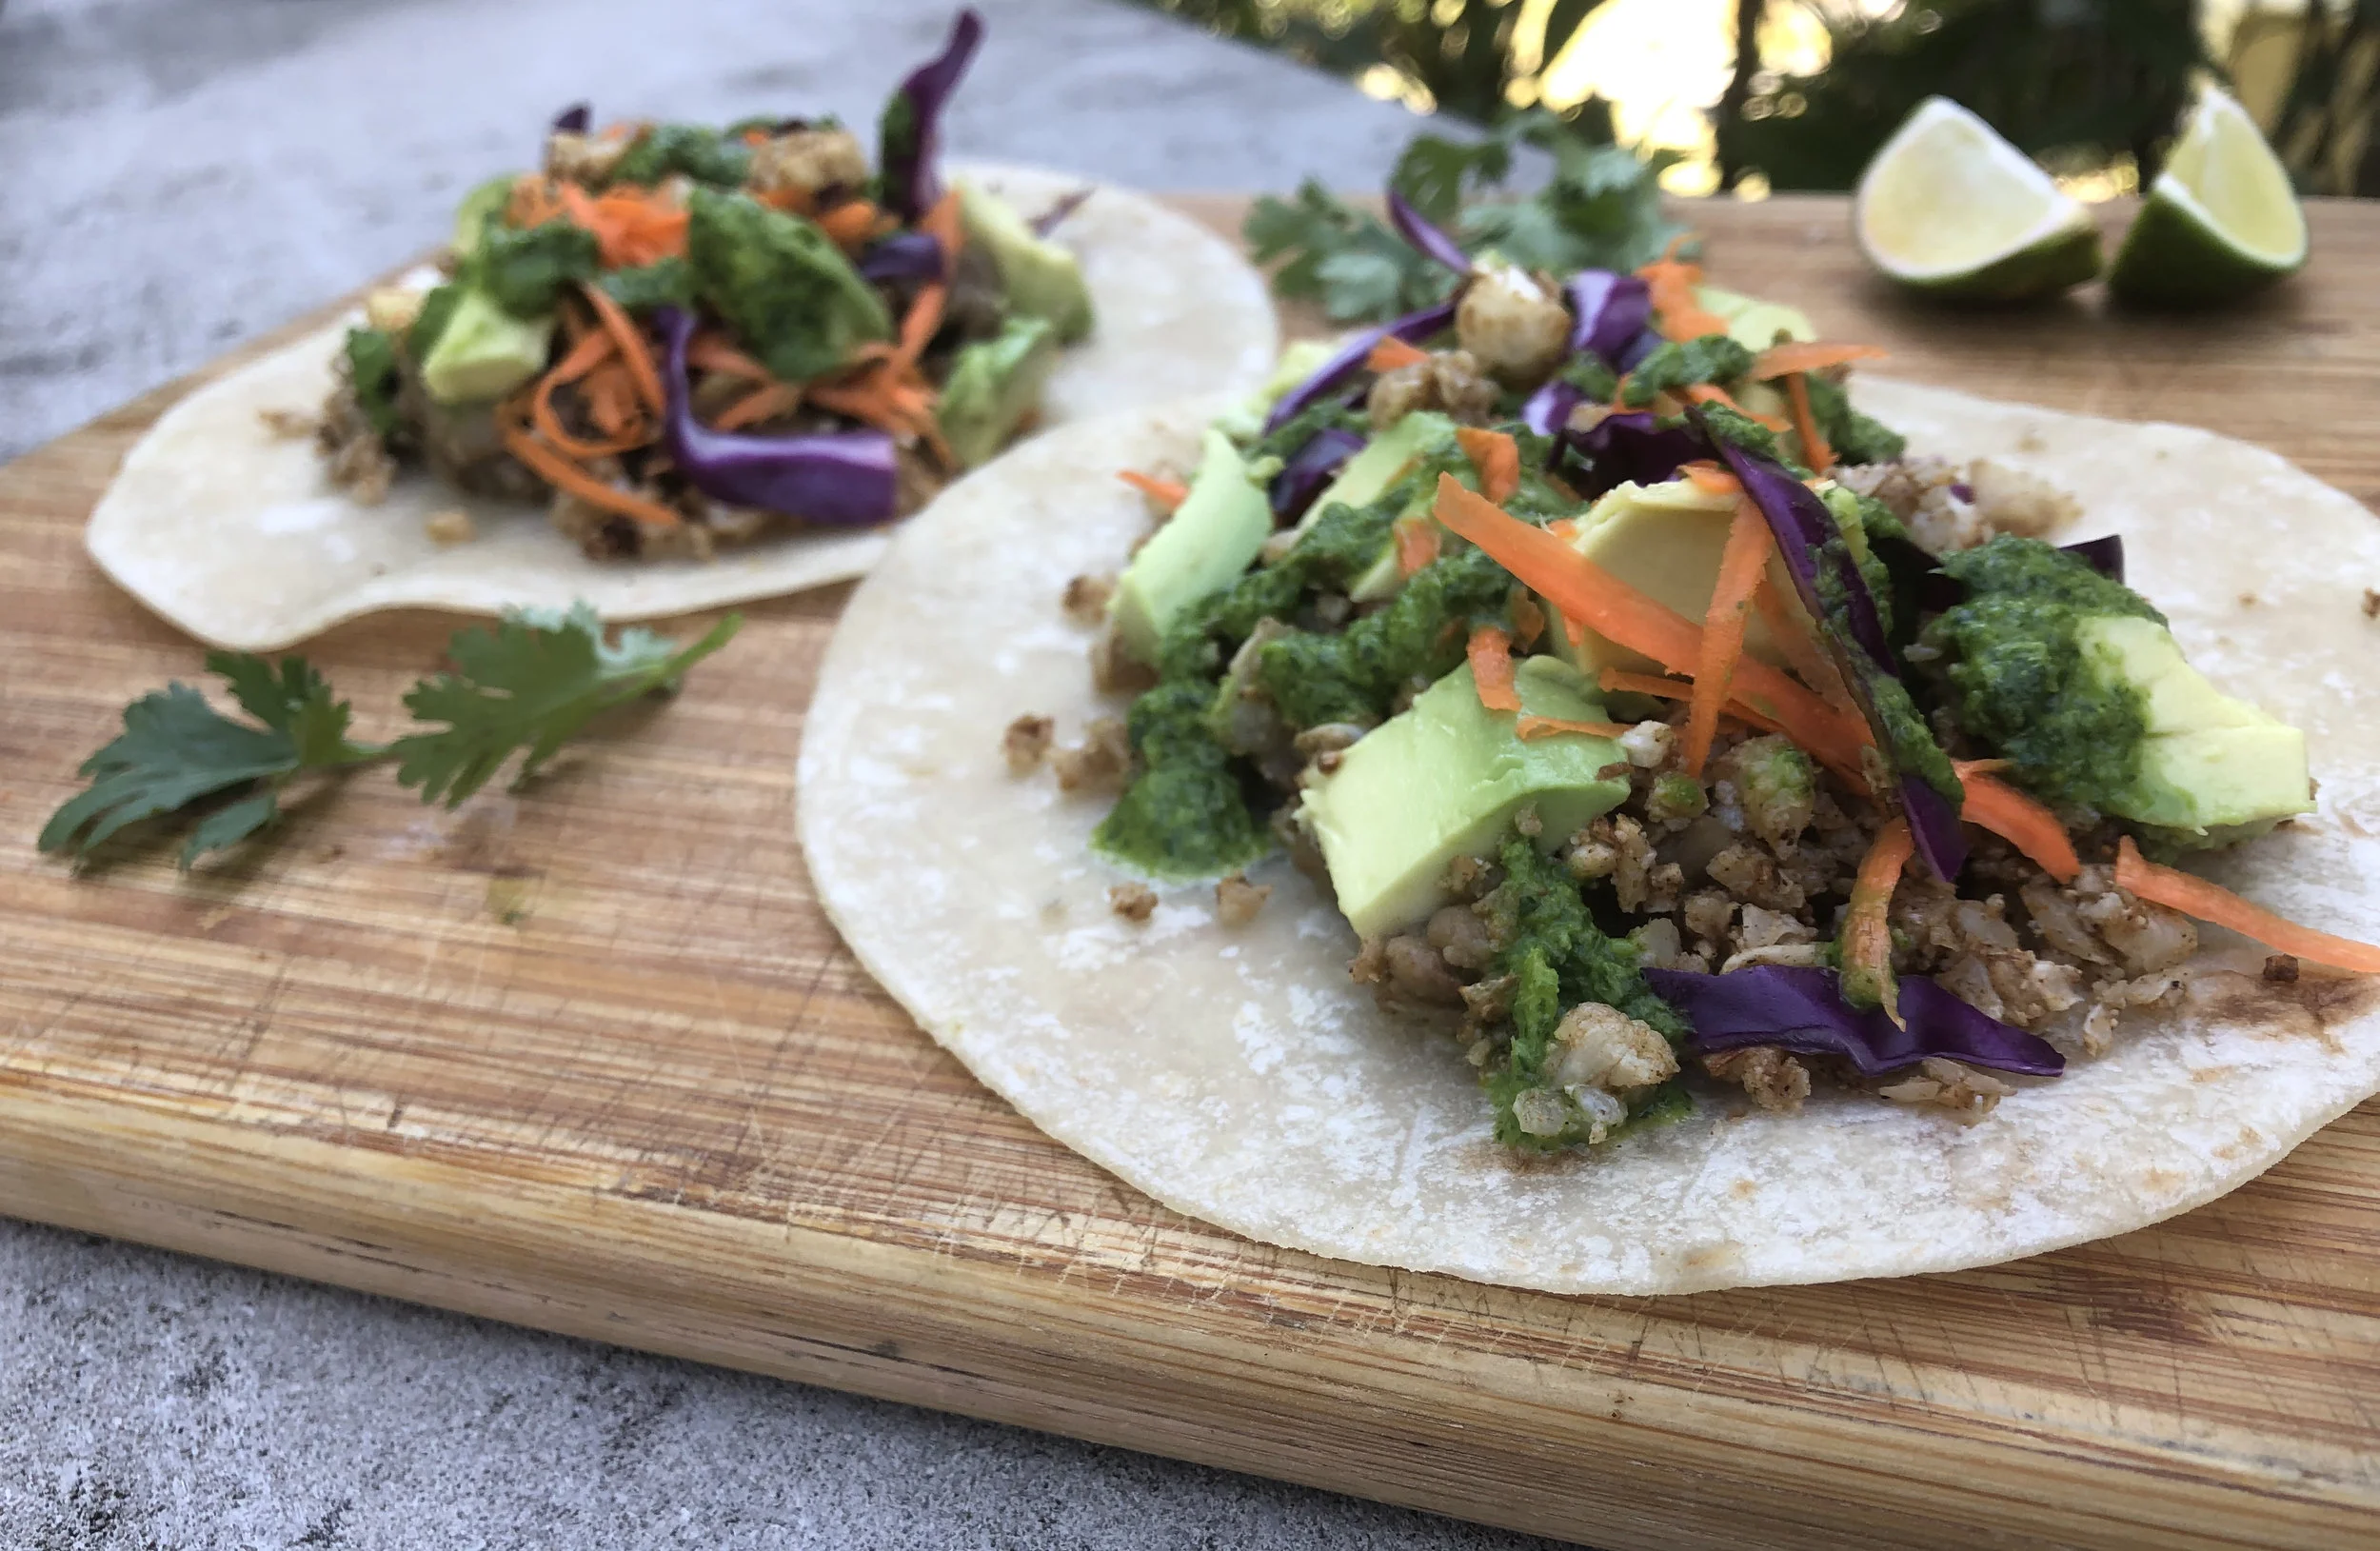
Lentil and Cauliflower Tacos with Cilantro Lime Chutney

1/2 cup lentils
1 head cauliflower, ground in food processor (option: chopped)
1.5 cups fresh cilantro
1 tbl fresh lime juice, additional for serving
1 carrot, shredded
1/2 cup red cabbage, thinly sliced
1 avocado, sliced
1 large clove of garlic
tortillas
2 tbl olive oil
1 tsp smoked paprika (optional)
1/2 tsp cumin
1/4 tsp chili powder
1/8 tsp nutmeg
1/8 tsp all spice
Salt
Pepper
Preheat oven to 400 degrees.
Rinse lentils through a mesh sieve under running water. Add to a small pot with 1 cup of water and smoked paprika, if using. Bring to a boil, then reduce heat to maintain a gentle simmer for about 25 minutes. Add more water if needed. Lentils should be tender, not mushy.
Meanwhile, place ground or chopped cauliflower into a mixing bowl. Add olive oil, cumin, chili powder, nutmeg, all spice, salt, and pepper. Mix with a spoon to combine. Lay flat on a baking sheet. Place sheet in the oven for about 20-30 minutes, flipping them with a spatula half way through.
Once lentils and cauliflower are finished cooking, transfer to separate bowl for taco assembly.
Cilantro Chutney: Place cilantro with stems in a food processor. Add garlic, 2 tbl lime juice, 1 tsp salt, and 1/4 cup olive oil. While blending, slowly drizzle about 1/2 cup water until ingredients are incorporated and the consistency is pourable but not too watery. You may not need to use all the water.
Assemble taco, adding any toppings you enjoy. Option to add hot peppers.
Beans and Greens on Toast

1 can white beans, rinsed
1/2 yellow onion, thinly sliced
1 garlic, clove, chopped
1 cup Kale, washed and de-stemmed
1 slice of Sourdough
1/2 cup chicken broth
In a cast-iron skillet, heat about 2 tbl olive oil. Add onions and allow to cook until soft. Add garlic and sautée for approximately 2 minutes. Stir often so as to not let the garlic burn.
Add beans and broth. Allow to simmer for about 10-15 minutes. Shred kale by hand and mix it in until the kale is nearly wilted, but still firm.
Push the mixture toward the sides of the pan. Add slice of bread in the middle and allow to absorb flavors and begin to toast.
Once bread is at your preferable toastiness, take off the heat, drizzle with a little extra virgin olive oil, add a dash of smoked paprika and serve hot.